In this guide, we’ll show you how to build your drone from scratch. You’ll learn about the parts needed for flight, how to find them, and how to assemble everything. By the end, you’ll be able to build a drone for amazing aerial shots or even for flying on its own.
One DIY drone project uses a 1000mAh battery for 16-18 minutes of flight. It’s light, weighing 109 grams, and has a 2MP 720p HD camera for great footage. And the best part? It costs about $100, showing you can fly your own drone without spending a lot.
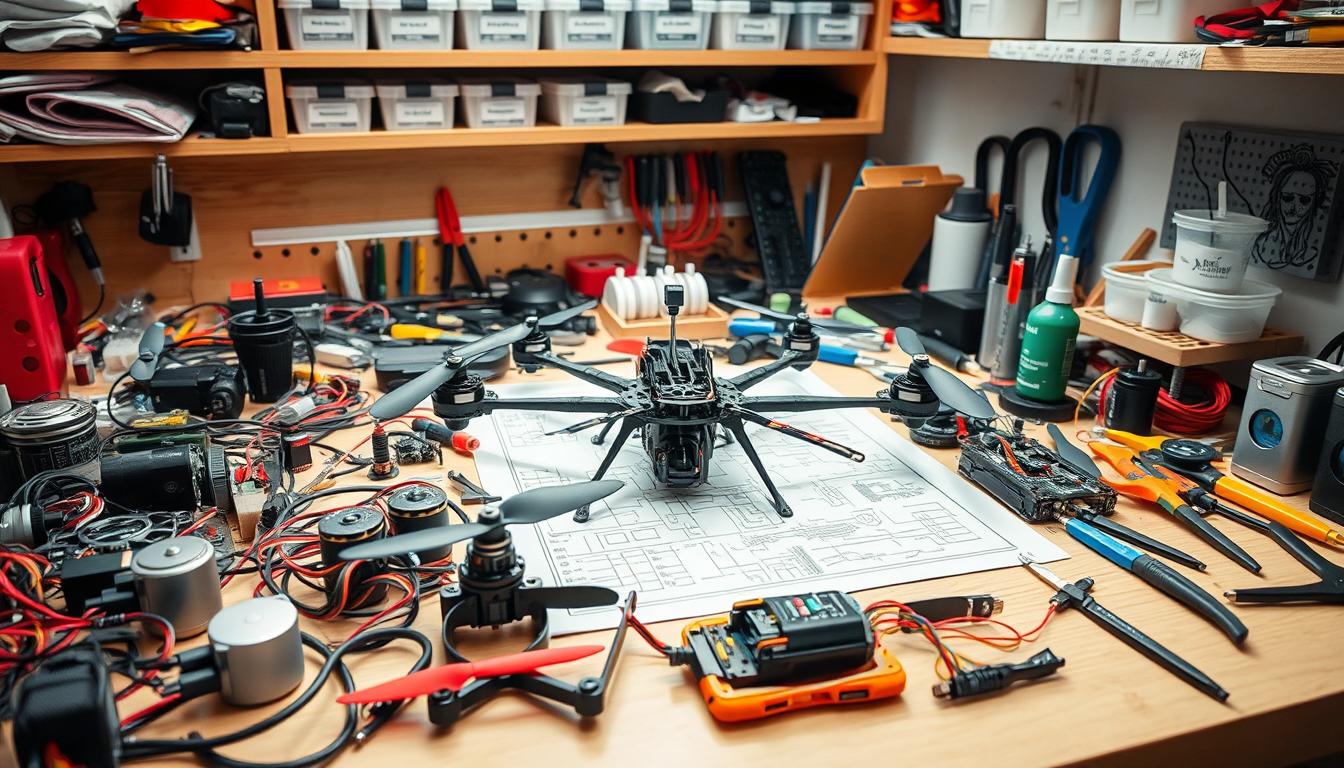
To start your DIY drone project, you’ll need parts like a flight controller, GPS, and motors. You’ll also need tools like a soldering iron and wire cutters. Don’t worry if it seems a lot – we’ll help you through each step, from learning drone physics to building your frame.
Key Takeaways
- Building a DIY drone is an affordable and rewarding hobby, with projects costing around $100 on average
- Essential components for a drone include a flight controller, GPS module, motors, propellers, and a battery
- A successful DIY drone can achieve 16-18 minutes of flight time and capture high-quality video footage
- Learning about drone physics, frame design, and component selection is crucial for a successful build
- With the right guidance and resources, anyone can build their own custom drone and take to the skies
Introduction to DIY Drone Building
Starting a DIY drone project is exciting and rewarding for hobbyist drone fans. You can build a small FPV drone or a big octocopter. This guide helps you build different drones, teaching you to find and use parts yourself.

You’ll need basic tools like a soldering iron and a multimeter. You’ll also need double-sided sticky tape and Velcro. Drones come in various sizes, from nano to large, with quadcopters being the most common.
Quadcopters have four propellers, allowing them to move in four directions. But, if one motor fails, the drone might crash unless it has special code to help.
When picking a frame, think about size and material. Smaller frames are agile but less stable. Larger frames are less agile but more stable.
Popular frame materials include carbon fiber, wood, and aluminum. The frame’s design also matters, with “X”, “+”, and “H” frames being common. The “X” frame is classic, the “+” frame is different, and the “H” frame has more room for electronics.
Building the frame is simple, with parts that slide and lock. Arm designs are like I-beams for strength. The main electronics split battery power for the motors and control board.
Brushless motors are better than brushed motors because they’re efficient and last longer. They come in different types, like inrunners and outrunners.
Building your own drone allows you to customize it to your specific needs and preferences, making it a truly unique and personalized experience.
Understanding the Basics of Drone Physics
Starting our DIY drone project means learning about drone physics basics. Knowing these principles helps us make better choices during design and building. This leads to a more fun and successful flying experience.
Newton’s Laws of Motion Applied to Drones
Newton’s laws are key for drone flight. The second law, F=ma, shows that a lighter drone flies longer and moves quicker. This is because it needs less force to speed up, making it more agile and stable.

The third law explains how propellers create lift. As they spin, they push air down, lifting the drone up. Drones use motors like brushed or brushless DC motors. Brushless motors are better for longer flights because they’re more efficient.
Importance of Lightweight Design for Optimal Performance
A lightweight drone design is vital for top performance. A lighter drone is easier to control and flies longer on less power. When picking parts for your DIY drone, keep these tips in mind:
- Choose a lightweight frame material such as carbon fiber or aluminum
- Opt for high-efficiency brushless motors that provide a good thrust-to-weight ratio
- Select a lithium polymer battery that balances capacity and weight
- Use lightweight sensors and electronics to minimize overall weight
Focus on using light components for the best drone performance. Remember, picking a battery is a balance between flight time and weight. Find the right mix for your needs.
| Component | Consideration |
|---|---|
| Frame | Lightweight materials like carbon fiber or aluminum |
| Motors | High-efficiency brushless motors with good thrust-to-weight ratio |
| Battery | Lithium polymer battery balancing capacity and weight |
| Electronics | Lightweight sensors and components to minimize overall weight |
By understanding drone physics and focusing on a light design, you’ll make a high-performance DIY drone. It will be both responsive and efficient in the air.
Exploring Different Types of Drones
When you start with DIY drone projects, knowing the different types is key. Each drone has its own strengths and challenges. It’s important to pick the right one for your needs and skill level.
Quadcopters: The Go-To Choice for Beginners
Quadcopters are the top pick for new drone fans. They are stable, easy to control, and simple to build. With four propellers, they offer great control for photos, videos, and learning to fly.
Quadcopters are very popular, both for fun and work. They are easy to use and versatile. This makes them a great first choice for anyone wanting to build a drone.
Beyond Quadcopters: Bicopters, Tricopters, Hexacopters, and Octocopters
But there’s more than just quadcopters. Other drones offer unique benefits and challenges:
- Bicopters: They have two propellers and are simpler but less stable than quadcopters.
- Tricopters: With three propellers, they strike a balance between simplicity and stability.
- Hexacopters: Six propellers mean more stability and can carry more weight, great for advanced uses.
- Octocopters: Eight propellers offer the most stability and can carry the most weight. But they are complex and expensive for beginners.
Each drone has its own pros and cons. Beginners should think about complexity, flight time, cost, and how easy they are to fly. Choosing the right drone is important for a successful DIY project.
| Drone Type | Number of Propellers | Stability | Complexity |
|---|---|---|---|
| Quadcopter | 4 | High | Moderate |
| Bicopter | 2 | Low | Low |
| Tricopter | 3 | Moderate | Moderate |
| Hexacopter | 6 | Very High | High |
| Octocopter | 8 | Extremely High | Very High |
“The key to a successful DIY drone project is to start with a solid understanding of the different drone types and their characteristics. By choosing the right type for your skill level and goals, you’ll be well on your way to creating a drone that truly soars.”
Choosing the right drone is crucial for a good DIY drone project. Research each type’s features. Start with a simpler drone like a quadcopter before tackling more complex ones.
Choosing the Right Frame for Your DIY Drone
When starting a DIY drone project, picking the right frame is key. The size and material of the frame affect how well your drone flies and what it can carry. Let’s look at what to consider when choosing the perfect frame for your DIY drone.
Frame Size Considerations
Drone frames are measured diagonally from arm tip to arm tip in millimeters. Smaller frames, under 250mm, are great for racing and tight spaces because they’re agile. Larger frames, from 450mm to 800mm or more, are better for stability and carrying heavy items, like cameras.
- Intended use and application of your drone
- Desired flight characteristics (agility vs. stability)
- Payload requirements (camera, sensors, etc.)
- Battery size and weight
- Motor and propeller compatibility
Popular Frame Materials: Carbon Fiber, Wood, Aluminum, and More
The material of your drone frame affects its strength, weight, and durability. Here are some common materials to think about:
- Carbon fiber frames: These frames are very strong and light. They’re great for high-performance drones but can be pricey.
- Wooden frames: Wooden frames are cheap and easy to work with. They’re light and can be customized, but they’re not as durable as other materials.
- Aluminum frames: Aluminum frames are strong and affordable. They’re good for bigger drones or those needing a solid build.
| Frame Material | Strength | Weight | Cost |
|---|---|---|---|
| Carbon Fiber | High | Low | High |
| Wood | Medium | Medium | Low |
| Aluminum | High | Medium | Medium |
Choosing the right frame material depends on your budget, desired performance, and the specific requirements of your DIY drone project.
Other materials like foam and plastic are also options. Foam is light and shock-resistant, while plastic is cheap and easy to make. Each material has its pros and cons, so think about what you need before deciding.
Frame Arm Orientation and Its Impact on Drone Performance
Building a DIY drone means the frame arm orientation is key. It affects your drone’s performance and stability. There are three main quadcopter frame designs: “X” frame, “+” frame, and “H” frame. Each has its own benefits.
The “X” frame is a top pick among drone fans. Its arms are at right angles, balancing weight and thrust. This makes for stable and responsive flight. It’s great for aerial photography and fun flying.
The “+” frame, or plus frame, has a forward-facing arm. It’s perfect for aerial shots and videos. The arm design also cuts down on propeller blockage.
The “H” frame is a hit with drone racers. It looks like an “H” from above. It has more room for electronics and batteries, making it compact and fast.
| Frame Type | Arm Orientation | Benefits |
|---|---|---|
| X Frame | Arms at right angles | Balanced weight distribution, stable flight |
| + Frame | Forward-facing arm | Clear front view for cameras, reduced propeller obstruction |
| H Frame | Resembles the letter “H” | More space for electronics, compact and streamlined design |
Choosing a frame for your DIY drone depends on your project’s needs. Try out different arm orientations to see what works best for you and boosts your drone’s performance.
Designing and Assembling Your Custom Drone Frame
Building a custom drone frame is a fun part of making your own drone. It lets you make a drone that meets your exact needs. With the right tools and skills, you can make a frame that’s both light and strong.
First, you need to design your drone frame using computer-aided design (CAD) software. AutoDesk Inventor Professional and AutoCAD are good choices. They help you create detailed 3D models of your frame. This ensures all parts fit well together.
CAD software also helps you make your design better for weight, strength, and flying.
Using CAD Software for Frame Design
When designing your drone frame with CAD software, think about a few things:
- Frame size: Mini FPV racing quadcopters come in sizes like 280mm, 250mm, and 160mm. Pick a size based on how you plan to use it and your skill level.
- Material selection: You can use carbon fiber, wood, or aluminum for your frame. Each material has its own benefits for weight, strength, and how easy it is to put together.
- Infill density: For 3D printed frames, use an infill of 50% or more for strength. Arms should have even more infill, about 80% or more, to handle crashes better.
Laser Cutting and Assembly Techniques
After designing your frame, it’s time to make it real. Laser cutting is a great way to cut out your frame parts from materials like carbon fiber or plywood. It makes sure your cuts are clean and precise, saving you from extra work.
Here are some tips for putting your laser-cut drone frame together:
- Use zip ties or adhesives to hold parts in place. This keeps your frame strong.
- Make sure your frame parts, like arms, are thick enough. Aim for at least 3mm for plates and 4mm for arms to be crash-resistant.
- Take your time and double-check all connections. A well-built frame is key for your drone’s performance and longevity.
| Component | Starting Price |
|---|---|
| Motors | $7 per motor |
| ESCs | $5 per ESC |
| Flight Controllers | $13 |
| Radio & Receiver Sets | $50 |
| Battery Cables and Connectors | $2 |
By following these steps and spending time on design and assembly, you can make a custom drone frame that fits your needs perfectly. Remember, a well-made frame is the base of a great DIY drone.
Powering Your DIY Drone: Battery and Electronics Basics
Understanding how to power your DIY drone is key. At the heart of every drone is a system of batteries and electronics. These work together to keep your drone flying. We’ll explore the basics of drone batteries and drone electronics to help you make smart choices.
The drone’s electrical system is simple. The drone battery powers the motors and control board. The control board is the drone’s brain, controlling the motors based on signals from the controller.
Choosing the right drone battery is important. Lithium polymer (LiPo) batteries are popular for drones. A 3S LiPo battery, for example, has three cells and outputs 12.6V when full, enough power for your drone electronics.
Building your own drone can save you money and let you customize it to your needs.
When powering your DIY drone, consider the voltage needs of your parts. For example, an Arduino Uno needs 8 to 9V from your drone battery. You might also need a voltage level shifter for signals between components.
Grounding your components properly is also crucial. This ensures power is distributed well and reduces signal interference. Tools like the Matek FCHUB-12S help with this, offering features like current sensing and filtered DC voltage outputs.
Motors and Electronic Speed Controllers (ESCs) Explained
When building your DIY drone, picking the right motors and ESCs is key for top performance. We’ll explore brushed and brushless motors, inrunner and outrunner setups, and the right ESCs for your motors.
Brushed vs. Brushless Motors
Brushless motors are the top pick for drones because they’re more efficient and last longer than brushed motors. They don’t need brushes, which cuts down on friction and wear. This makes them more reliable and powerful for your DIY drone.
The A2212 1400KV brushless motor is great for medium-sized quadcopters. It works well with 8-10 inch propellers like the SoloGood 1045. This combo offers the right mix of thrust and efficiency for your drone.
Inrunner and Outrunner Motor Configurations
Brushless motors are either inrunners or outrunners. Inrunners have the rotor inside, while outrunners have it outside. Outrunners are better for drones because they have more torque and don’t need gears.
When picking motors, look at the KV rating. It shows how fast the motor spins. Higher KV means faster speed, while lower KV means more torque. Pick a motor that fits your drone’s performance and propeller size.
Choosing the Right ESCs for Your Motors
Electronic speed controllers (ESCs) are vital for controlling your brushless motors. They manage the motor coils for smooth and efficient operation. When choosing ESCs, consider the max current rating, battery type, and programming options.
The Spektrum Avian 30-Amp Smart Lite Brushless ESC is a great choice for DIY drones. It works with 2S to 4S LiPo batteries and offers reliable performance. Use it with a compatible battery, like the Spektrum 11.1V 2200mAh 3S 50C Smart LiPo Battery, for enough power and flight time.
| Component | Recommendation | Price |
|---|---|---|
| Motor | A2212 1400KV Brushless Motor | $10 – $15 |
| ESC | Spektrum Avian 30-Amp Smart Lite Brushless ESC | $20 – $30 |
| Propeller | SoloGood 1045 Propellers (Set of 16) | $10 – $15 |
| Battery | Spektrum 11.1V 2200mAh 3S 50C Smart LiPo Battery | $20 – $30 |
When picking parts for your DIY drone, make sure they work well together. Check the specs and drone flight control system guides to make the best choices for your drone.
Investing in good motors and ESCs will make your drone more efficient and reliable. Take your time to find the right parts for your DIY drone project.
Propeller Selection for Optimal Drone Performance
Choosing the right propeller is key for your DIY drone’s best performance. Propellers vary in size and pitch. Knowing how these affect your drone’s flight is crucial for making smart choices.
Understanding Propeller Size and Pitch
Propellers are labeled with a four-digit number, like 8045. The first two digits show the diameter in inches. The last two digits are the pitch, also in inches. Pitch is how far the propeller moves forward in one turn, ignoring slippage.
Choosing the right propeller size and pitch depends on several things. These include the motor’s KV rating, the drone’s purpose, and the flight characteristics you want. Here’s a quick look at how size and pitch impact drone performance:
| Propeller Size | Effect on Drone Performance |
|---|---|
| Larger diameter | Increased thrust, better stability, slower acceleration |
| Smaller diameter | Reduced thrust, more agility, faster acceleration |
| Propeller Pitch | Effect on Drone Performance |
| Higher pitch | More air moved per rotation, better for low KV motors |
| Lower pitch | Less air moved per rotation, better for high KV motors |
Matching Propellers to Motor KV Ratings
The KV rating shows how fast a motor spins per volt, without a load. It’s important to match the propeller with the motor’s KV rating for the best drone performance and efficiency.
- Low KV motors (under 1000 KV) need larger, high-pitch propellers for more thrust and efficiency.
- High KV motors (over 1000 KV) pair well with smaller, low-pitch propellers for quicker acceleration and better agility.
Remember, finding the perfect propeller and motor combo may take some trial and error. It’s about finding the right balance between performance, efficiency, and your drone’s needs.
Lithium Polymer (LiPo) Batteries for DIY Drones
Lithium Polymer (LiPo) batteries are a top pick for powering DIY drones. They are light and pack a lot of energy. This makes them perfect for our flying projects.
LiPo batteries have a high energy density. They can store 140 to over 200 Wh/kg in weight and 250 to more than 350 Wh/L in volume. This means we can have more power without adding too much weight. This leads to longer flights and better control.
Understanding LiPo Cell Count and Voltage
Choosing the right LiPo battery for our DIY drone is important. We need to know the cell count and voltage. A single LiPo cell has a 3.7-volt nominal voltage. When connected in series, the voltage goes up. For example, a 2-cell battery has a 7.4-volt nominal voltage, and a 6-cell battery has 22.2 volts.
The fully-charged voltage of a LiPo cell is 4.2 volts. The minimum safe voltage is 3 volts. Keeping an eye on these voltages helps our batteries last longer.
Choosing the Right Battery Capacity for Your Drone
When picking a LiPo battery, the capacity is key. It’s measured in milliamp hours (mAh). A higher capacity means more energy stored and longer flight times. For example, a 5000 mAh battery can supply 5 amperes for one hour.
We need to think about our drone’s power needs when choosing a battery. A bigger battery means longer flights but also more weight. Finding the right balance is key for the best performance.
We should also look at the battery’s discharge rate or “C” rating. This tells us how fast the battery can safely discharge. A higher C rating means more power quickly without overheating. This is important for drones that need to perform well.
By understanding LiPo cell count, voltage, capacity, and discharge rate, we can choose the best battery for our DIY drones. This ensures our drones have the power and performance we need for great flights.
DIY Drone Projects and Ideas for Beginners
Starting a DIY drone project is exciting and rewarding for beginners. With 684 people searching for DIY drone projects, it’s clear many are interested. You can build an FPV drone for racing, a WiFi-controlled drone, or a low-cost drone using an ESP32. The possibilities are endless.
Building a hand-controlled drone or a tiny Arduino drone with an FPV camera is popular. These projects use components like the F450 Frame, 1000kv brushless motor, and 1045 propeller. You can customize your drone to fit your needs and preferences by choosing your own components.
DIY drone projects can save you money compared to buying a pre-made drone. If you already have some components, like a remote control or camera, you can save even more. This makes building your drone more affordable.
When exploring beginner drone projects, you’ll find many drone types to choose from. These include quadcopters, fixed-wing drones, specialized drones, and hybrid models. Each type is suited for different uses, like aerial photography, videography, and search and rescue operations.
Drone kits come in different levels of complexity. This lets you pick the one that matches your skill level and preferences:
| Kit Type | Description |
|---|---|
| Ready-to-Fly (RTF) | Fully assembled and ready to fly out of the box |
| Bind-and-Fly (BNF) | Requires a compatible transmitter for control |
| Almost-Ready-to-Fly (ARF) | Requires some assembly and additional components |
| Do-It-Yourself (DIY) | Allows for complete customization and building from scratch |
As you explore DIY drone projects, you’ll see how versatile and important drone technology is. Drones are changing industries like agriculture, construction, mining, and search and rescue. With the right beginner drone projects and diy drone ideas, you can join the community of enthusiasts and professionals. Together, we’re pushing the limits of what’s possible with racing drones and other drone applications.
Tips and Tricks for Successful DIY Drone Building
Building your own drone is a rewarding experience. It requires patience and attention to detail. To succeed, remember a few key tips. First, always double-check your wiring and use thread-locking compound on screws to prevent loosening.
Properly balancing your propellers is also crucial. This ensures your drone flies well and stays stable.
Before your first flight, test each part of your drone. Check motor rotation and make sure the flight controller and remote control communicate well. Also, verify that all sensors work correctly.
It’s important to know local drone laws. Ignoring these can lead to fines or legal trouble.
When picking parts, think about size and weight. This helps your drone fly better. Quadcopters are great for beginners because they are stable and agile.
Larger drones like hexacopters and octocopters are good if you need extra power. Brushless motors and ESCs are better than brushed ones because they last longer. LiPo batteries are the best choice for most drones.
Building a DIY drone means being ready to learn and solve problems. With hard work and the right help, you can make a drone that’s just what you need. Don’t hesitate to ask for advice from drone experts or online communities. Their tips can help you avoid common mistakes and reach your goals faster.