Did you know that nearly 5% of drone crashes happen because of build defects, not pilot mistakes? With drones becoming more popular, it’s key for fans to know how to fix common problems. This knowledge helps keep your drone in the air and saves you from expensive fixes or buying new ones.
This quick guide is here to help you with drone maintenance and repair. We’ll talk about battery issues, calibration mistakes, and propeller damage. You’ll learn how to solve these problems and prevent them from happening again.
We’ll also cover why keeping your drone in good shape is so important. This includes cleaning, checking for loose parts, storing it right, and following the maker’s instructions. By doing these things, you can make your drone last longer and fly better every time.
Key Takeaways
- Learn to diagnose and fix common drone issues, such as battery problems, calibration errors, and propeller damage
- Understand the importance of regular drone maintenance for optimal performance and longevity
- Discover practical solutions and preventative measures to keep your drone flying smoothly
- Gain knowledge and confidence in basic drone troubleshooting and repair techniques
- Explore the benefits of firmware updates and compatibility for improved drone stability and features
Understanding Common Drone Issues
Drone enthusiasts often face problems with their aerial devices. Issues like battery problems, calibration errors, and propeller damage can ruin a flight. Let’s explore these common problems and how they affect flying.

Battery Problems
Battery issues are a big problem for drone users. In fact, 66% of drone problems are battery-related. These issues can cause low battery life, poor charging, overheating, or swelling.
When your drone’s battery doesn’t work right, it can lead to short flights and unexpected shutdowns. This can be dangerous.
Calibration Errors
Calibration errors are another big issue, affecting about 42% of drones. When sensors like the compass or gyroscope aren’t calibrated, your drone may drift or wobble. This makes flying hard and increases crash risks.
| Calibration Issue | Potential Cause | Solution |
|---|---|---|
| Compass (magnetometer) calibration | Strong electromagnetic interference (EMI) | Perform compass calibration in an area free from EMI sources |
| GPS signal strength | Weak GPS signal or interference | Ensure a clear view of the sky and avoid flying near tall structures |
| Flight controller mounting | Incorrect orientation of the flight controller | Adjust flight controller configuration to match the mounting position |
Propeller Damage
Propeller damage is a common problem, making up about 22% of drone issues. Damaged propellers can affect your drone’s balance and efficiency. This can lead to poor performance and more power use.
Regularly checking and replacing damaged propellers is key to keeping your drone safe and working well.
Other issues like camera glitches, signal loss, and bad antenna placement also affect drones. To avoid these, do regular maintenance. This includes calibrating sensors, checking hardware, and monitoring battery health. Being proactive helps ensure a better flying experience.
Preparing for Troubleshooting
Before we start troubleshooting, make sure you have all the tools and resources you need. Having the right items and information ready can make the process smoother. This way, we can fix problems more easily.
Gather Necessary Tools and Parts
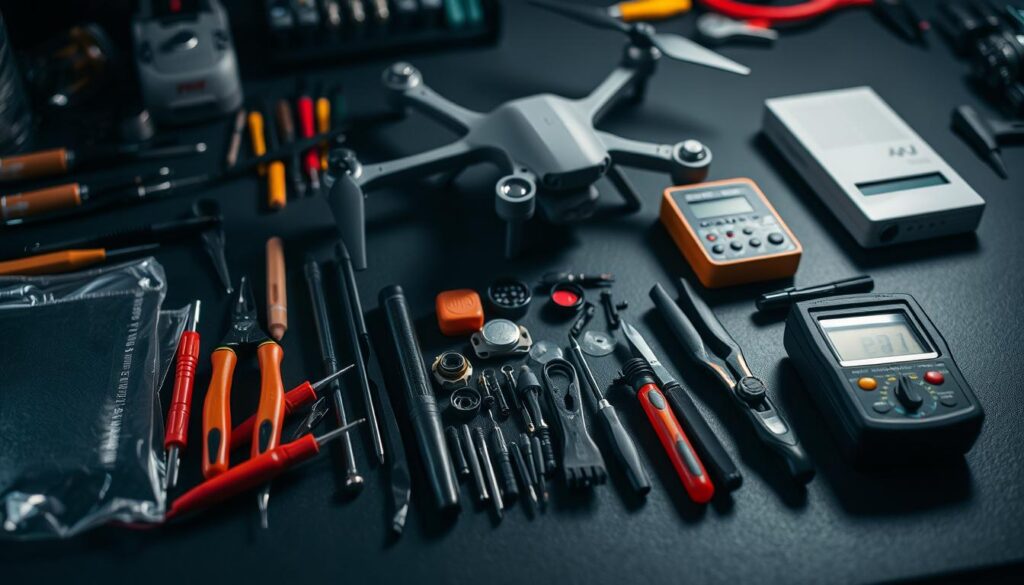
To fix common drone problems, you’ll need a good toolkit. Here are some drone repair tools you should have:
- Screwdriver set (including Phillips and flathead)
- Pliers and tweezers
- Soldering iron and solder
- Multimeter for electrical diagnostics
- Hex key set for accessing internal components
Also, having drone spare parts can save a lot of time. Keep these items ready:
- Extra propellers and propeller guards
- Spare batteries and chargers
- Replacement motors and ESCs
- Camera and gimbal components

Review User Manual and Online Resources
Always check your drone’s user manual before starting repairs. The manual has important info, like:
- Assembly and setup instructions
- Recommended maintenance schedules
- Troubleshooting guides for common issues
- Warranty information and customer support contacts
There are also many online resources for drone troubleshooting:
| Resource | Description |
|---|---|
| Manufacturer Websites | Official product pages, FAQs, and support forums |
| Drone Forums | Community-driven discussions and problem-solving |
| Online Tutorials | Step-by-step guides and videos for repairs and maintenance |
| Social Media Groups | Connect with fellow drone enthusiasts for advice and tips |
Proper preparation is key to successful drone troubleshooting. By gathering the necessary tools, spare parts, and reviewing relevant resources, we can approach issues with confidence and efficiency.
Checking Battery Health and Charging
Keeping your drone’s battery in good shape is key for safe and efficient flights. Not taking care of your battery can cause it to perform poorly, fly for shorter times, and even fail. Here are some important tips for checking and charging your drone battery right.
First, always check your battery for any damage like bulges, punctures, or leaks. If you see any damage, stop using the battery and get a new one. Also, compare the battery’s voltage with what the maker says to see how it’s doing.
To really understand your battery’s health, do discharge tests. If your flights are much shorter than usual, it might be time for a new battery. Also, watch the battery’s internal resistance. High resistance means less power and shorter flights.
For charging tips, always use the charger that came with your battery. Don’t overcharge or undercharge, as it can harm your battery. Store your batteries in a cool, dry spot and avoid extreme temperatures. For DJI batteries, charge and discharge them to about 15% every 2-3 months to keep them healthy.
Many smart batteries give you data through the drone app, like cell voltages and cycle counts. By keeping an eye on this info, you can catch any battery problems early.
Remember, taking care of your drone battery is crucial for safe and long flights. By following these simple tips and checking your battery often, you can enjoy flying your drone worry-free.
Calibrating Sensors and Components
To make sure our drones fly well, we need to calibrate their sensors and parts often. Calibration sets a baseline for sensors like the gyroscope, accelerometer, and compass. This helps with stable flight and lowers the chance of accidents.
When we calibrate our drones, we should think about how far they’ve flown. If they’ve gone 25,118 ft, 26,781,877 ft, or 4,726,654 ft, it’s time for a check. This is key if we’ve gone to a new place or if our drone isn’t flying right.
Compass Calibration
The compass is key for drone navigation. To calibrate it, we rotate the drone around all three axes. But, magnetic declination can mess with this, so we might need to calibrate again after moving a lot. Make sure to avoid metal objects when calibrating the compass.
Gyroscope Calibration
The gyroscope helps measure the drone’s movement and position. Regular gyroscope calibration keeps the drone stable and smooth. We do this by placing the drone on a level surface and following the app’s steps.
IMU calibration is typically required during significant temperature changes as the components are sensitive to them.
Accelerometer Calibration
The accelerometer tracks the drone’s movement and tilt. Calibrating it helps with stable flight and quick responses to our commands. Like the gyroscope, we place the drone on a level surface and follow the app’s guide for calibration.
| Sensor | Calibration Frequency | Key Factors |
|---|---|---|
| Compass | After traveling to a new location or noticing flight issues | Magnetic declination, proximity to metal objects |
| Gyroscope | Regularly, especially during temperature changes | Temperature sensitivity, level surface |
| Accelerometer | Regularly, especially during temperature changes | Temperature sensitivity, level surface |
By calibrating our drones’ sensors and parts often, we ensure they fly smoothly and accurately. This means better control and less chance of crashes. Always check the calibration before flying, especially with drones that use RTK, which needs calibration to work.
Inspecting and Replacing Propellers
Propellers are key to any drone’s performance and safety. Regular checks and quick fixes for damaged propellers are vital. This keeps your drone running well and safe from accidents.
Look for wear and tear on your drone’s propellers. Signs include cracks, chips, bends, or scratches. Even small damage can cause problems like reduced efficiency and noise. If you spot any damage, replace the propeller right away to avoid bigger issues.
Identifying Propeller Damage
Many things can damage propellers, like crashes or poor handling. Different materials face different risks:
- Wooden propellers are strong but can crack or split.
- Nylon propellers bend easily during flight.
- Plastic propellers are cheap but break easily.
- Carbon fiber propellers are strong and light, great for work drones.
- Fiberglass propellers are heavy but last longer than others.
Regular drone propeller inspections help catch problems early. This keeps your drone running smoothly and reliably.
Properly Attaching and Tightening Propellers
When replacing or installing propellers, use the right tools. Make sure you have the correct screws and screwdrivers. It’s also important to know the difference between Clock Wise (CW) and Counter Clock Wise (CCW) propellers.
When installing, attach and tighten each propeller as the maker suggests. Loose propellers can cause vibrations and affect flight. For beginners, consider using propeller guards for safety, especially indoors. But remember, guards can weigh down your drone and affect battery life and wind resistance.
By focusing on regular drone propeller inspection, quick propeller replacement, and correct installation, you ensure your drone flies well and safely. This way, you can enjoy many hours of flying without worries.
Resolving Camera and Gimbal Issues
Drone enthusiasts face frustration when their camera or gimbal malfunctions. The Autel EVO II Pro has a 1-inch sensor and 20MP camera in its gimbal. This setup provides stable, high-quality aerial photos. Yet, drones can still face problems like gimbal overload, weak devices, loose parts, damaged cables, calibration errors, and outdated firmware.
Fortunately, many drone camera troubleshooting issues can be fixed by the pilot. Loose gimbals might need a slight adjustment with a screwdriver. Calibration can be done through the Autel Explorer App. Keeping your drone’s firmware updated is key for proper gimbal function and avoiding errors.
In some cases, like damaged cables or vibrations, you might need a pro. DJI has fixed gimbal issues for around €150. An eBay seller also refunded $200 to a customer for gimbal problems. When troubleshooting, check the gimbal dampener, arm, and propellers for vibration causes.
“I had an issue with my drone’s gimbal vibrating whenever the camera moved left or right. Sending it to DJI for repair cost me €150.86, but they fixed the problem, and now it works perfectly!”
If you’re having gimbal stabilization problems, here’s what to do:
- Check and secure the ribbon cable within the gimbal
- Gently blow air using a compressor to clear any dirt or debris
- Ensure that the propellers are balanced and not causing excess vibration
- Perform a gimbal calibration through the companion app
- Update your drone’s firmware to the latest version
Here’s a table showing the costs of professional gimbal repairs:
| Issue | Repair Service | Cost |
|---|---|---|
| Gimbal vibration and self-check failure | DJI Repair Center | €150.86 |
| Unspecified gimbal issues | eBay Seller Refund | $200 |
| Ribbon cable damage | Autel Drone Repair Facility | Variable |
While many gimbal issues can be fixed at home, some need a pro. Knowing common problems and solutions helps you tackle drone camera troubleshooting. This ensures your aerial photos stay stable and stunning.
Basic Troubleshooting for Drones
When our drones have problems, we need to solve them step by step. This way, we can find out what’s wrong and fix it. By doing this, we can keep flying without interruptions.
Systematic Approach to Problem-Solving
We should start by checking the 13 main parts of our drone. These parts include:
- Motors
- Propellers
- Chassis
- Gimbal
- Indicator lights
- Screws
- GPS
- Landing frame
- Electronic Speed Controller
- Batteries
- Wiring
- Compass
- Camera
It’s also important to keep a record of our drone’s model, the technician, and their email. This helps us track any problems and talk to support teams when needed.
Firmware Updates and Compatibility
Keeping our drone’s firmware updated is key for it to work well. Before we start troubleshooting, we should make sure our drone and controller have the latest firmware. Sometimes, updating or downgrading the firmware can fix issues like red sensor problems.
Hardware Inspection and Maintenance
Regular checks and maintenance are crucial for our drone’s health. We should look for loose propellers, damaged wires, or frame cracks. These can affect how well our drone works and its safety.
We also need to make sure propellers are installed right, spinning the correct way, and are securely attached.
| Troubleshooting Step | Description |
|---|---|
| Battery Check | Charge drone batteries, controller batteries, and other component batteries to 75% |
| System Reset | Power off the drone and control station, remove and cool batteries before reinserting |
| Calibration | Check for local interference, GPS signal, calibrate IMU, compass, and gimbal |
| Motor Inspection | Check propellers for correct installation, rotation direction, and security |
By following these steps, checking our drone’s hardware, and making sure firmware is compatible, we can avoid many problems. Always refer to your drone’s manual and error codes for more help. If you’re still stuck, don’t hesitate to ask for professional advice.
Dealing with Signal Loss and Interference
Drone pilots often face signal loss and interference, especially in crowded areas. It’s important to know what causes these issues and how to fix them. This way, you can avoid losing control of your drone.
New technology lets drones send FPV signals up to five miles away. But, flying near buildings or metal can cut this range in half. Weather like extreme temperatures and humidity can also weaken the signal.
Maintaining Line of Sight
Keeping your drone in sight is key to avoiding signal loss. Don’t fly too far, high, or low. Also, check your antennas and transmitters for damage, as it can harm the signal.
Avoiding Obstacles and Interference Sources
Steer clear of obstacles and sources of interference like Wi-Fi routers and cell towers. These can cause drone interference, leading to signal loss. The 2.4 GHz and 5.8 GHz bands are used for FPV drones. The 2.4 GHz band is better for range but more prone to interference.
Setting Return-to-Home and Fail-Safe Modes
Setting up return-to-home settings and fail-safe modes is crucial. These features help your drone land safely if it loses signal. This reduces the risk of crashes or drones flying away.
By following these tips and keeping an eye on your drone’s performance, you can avoid signal loss and interference. This makes flying safer and more fun.
Troubleshooting Motor and ESC Problems
When you face drone motor issues or need to ESC troubleshooting, it’s key to tackle the problem step by step. Motor and ESC problems can cause your drone to fly erratically or not at all. This can really mess up your drone’s performance.
First off, look for signs of overheating, damage, or loose connections in both motors and ESCs. Make sure the ESCs are set up right and update their firmware if it’s outdated. If you find any broken parts, swap them out quickly to get your drone flying smoothly again.
When you’re fixing ESC issues, listen for a long beep when it’s powered up and getting a PWM signal. If you don’t hear this beep, dig deeper. Check if the ESC matches the brand, if it has a BEC, and if the power supply is good enough.
If the ESC seems to be working but the motor won’t spin, here’s what to do:
- Make sure the ESC and motor voltages match
- Check the wire connections for damage
- Make sure the ESC and motor are paired correctly
- Use an oscilloscope for detailed checks, if you need to
Big changes in thrust, torque, current, RPM, or voltage might mean ESC and PWM signal problems. Look at voltage, RPM, and current stability. Make sure RPM, current, thrust, and torque values match up right.
For more help with testing and choosing the right power-train, look into extended support from top drone companies. They offer great advice and help with fixing tricky motor and ESC issues.
Seeking Professional Help and Repair Services
When we can’t fix our drone problems ourselves, it’s time to get help from experts. These skilled technicians can find and fix complex issues. They make sure our drones are safe to fly.
They know how drones work and use top-quality parts for repairs. This ensures our drones work well and safely.
Professional drone maintenance is key for fixing many issues. This includes camera and gimbal repairs, and replacing motors and propellers. They also help with battery health.
These services are affordable and quick, without losing quality. They can fix any crash damage and give us a plan to get our drones flying again.
Regular updates are also important for better flight performance and new features. Experts can update our drones’ software and check for damage. This keeps our drones flying smoothly and safely.
